

In this tutorial we will create labels for fixtures with their DMX address, Fixture ID and links (QR codes) to the Production Assist Cloud.
First, go to Window on the menu bar, open the Resource Manager and select the Print Labels tab. There you can create a new label template by clicking on the green button +Create. You can rename the template by double-clicking on its name.
To edit the template, simply click on the pencil icon to the right.

When a label is edited, the edit mode opens in the Renderer. There the fields and the sheet can be formatted
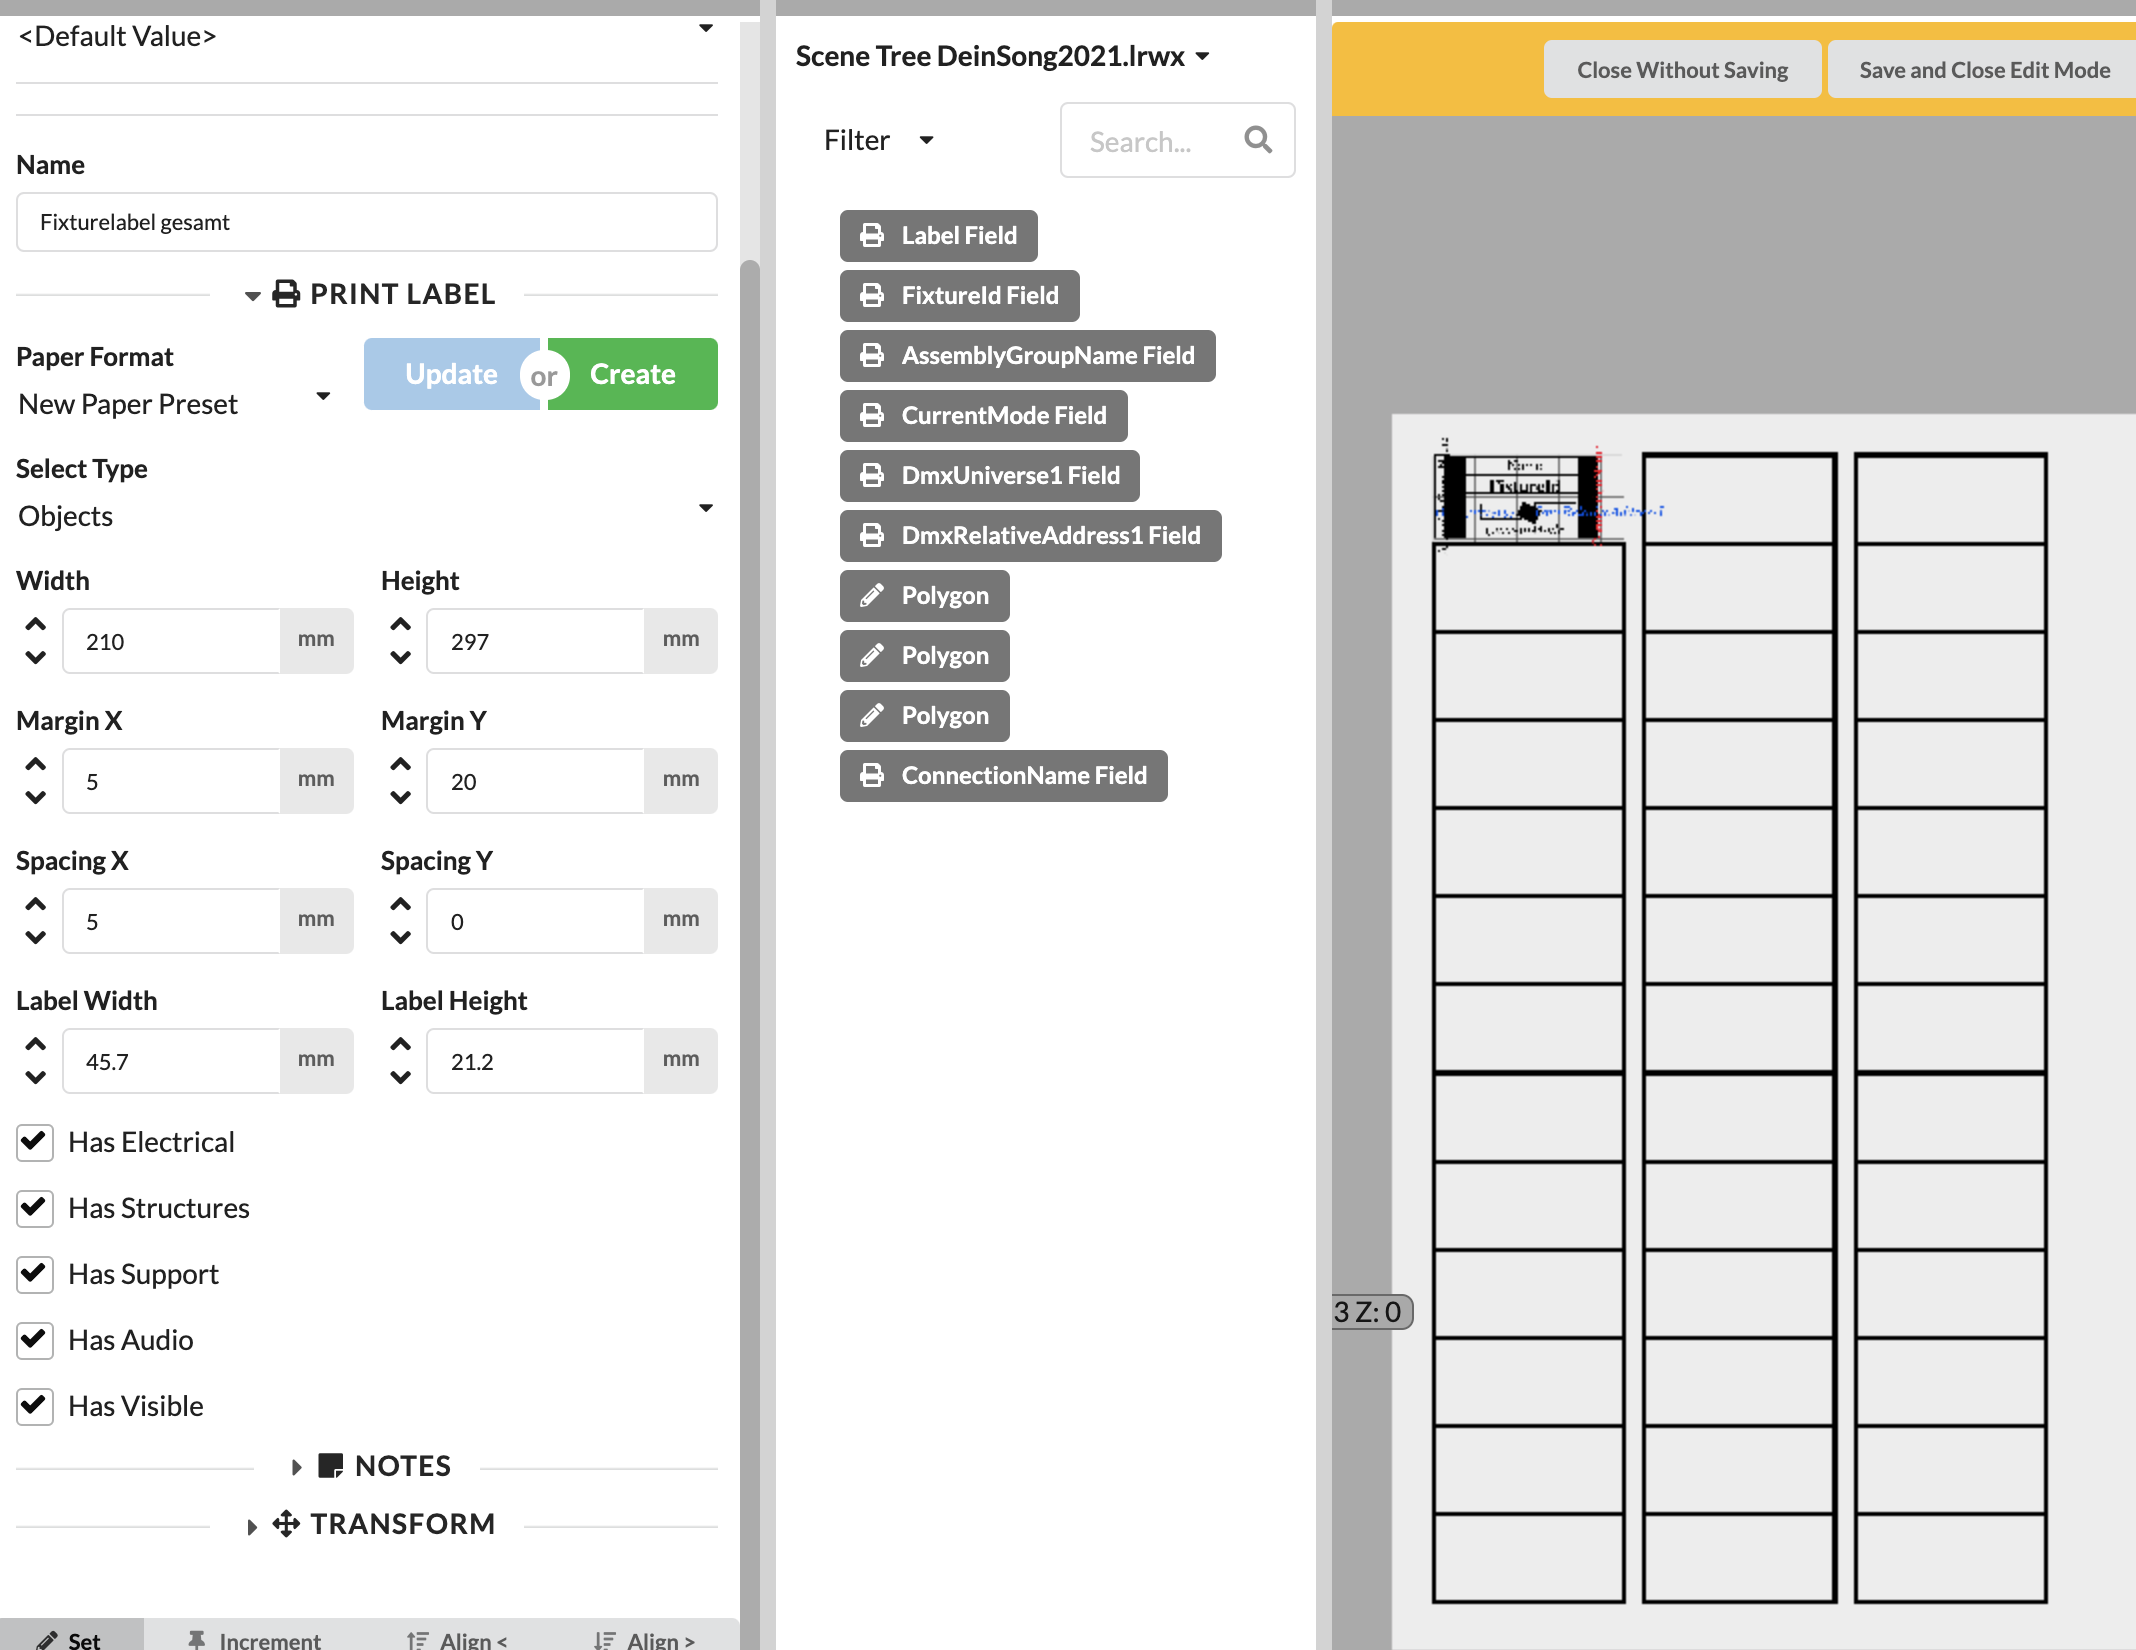
If no objects/fields are available or activated in the Scene Tree, you can set the following attributes in the Print Label tab:
Once you have determined the settings, they can be saved as a preset (Create) and later retrieved or updated (Update).
In the example here, an object label is designed and printed.
The upper left label with the 10x10mm grid is the template. Label fields (Field) can now be added via New Object in the toolbar, which display individual values/properties of objects on the labels. In addition, a QR code can be placed on it. Insert a field on the label template. When the field is enabled it can be positioned, colored and otherwise customized in the Object Properties.
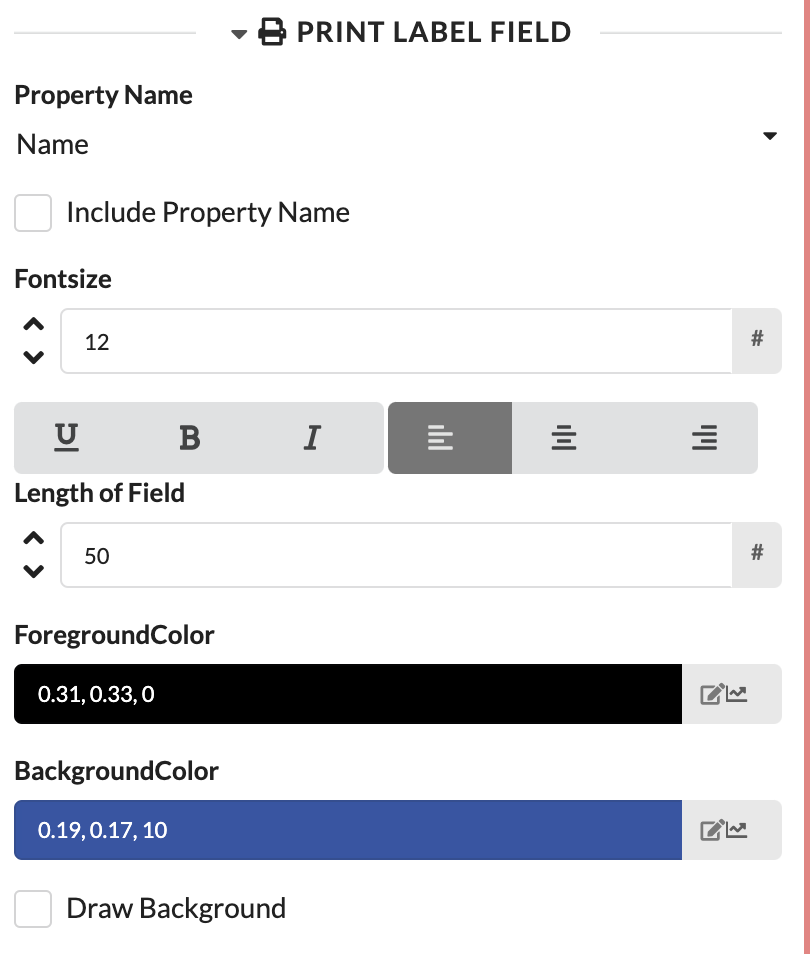
In the drop-down menu, you can select which property the field should display and whether the field name should be printed on the label. Furthermore, the font can be formatted and colored, and the maximum length of the field can be specified.
In the Transform tab, the field can also be rotated.
Furthermore, lines or polygons can be inserted as elements. To do this, select the Polygon option via New Object and as under Mode select Line or Array.
As an exercise, add the QR code, name, and FID as fields. You can position the fields on the right side. Simply grab them with the mouse and move them wherever you want.
When everything is ready, click Save and Close Edit Mode in the yellow bar at the top of the Renderer.
In the menu bar go to File -> Export and select Print Labels.
On the right side of this window, you can now select your label template. If you only want to print fixtures from a specific Assembly Sheet, you can select it. Otherwise, all fixtures will be printed (Scene).
You can also set the order in which the labels are arranged on the sheet. To do this, select a field to sort by and then whether the smallest or largest value comes first. For example, choose FID and under Sort from select Low to High. The fixtures are then sorted by FID on the sheet.
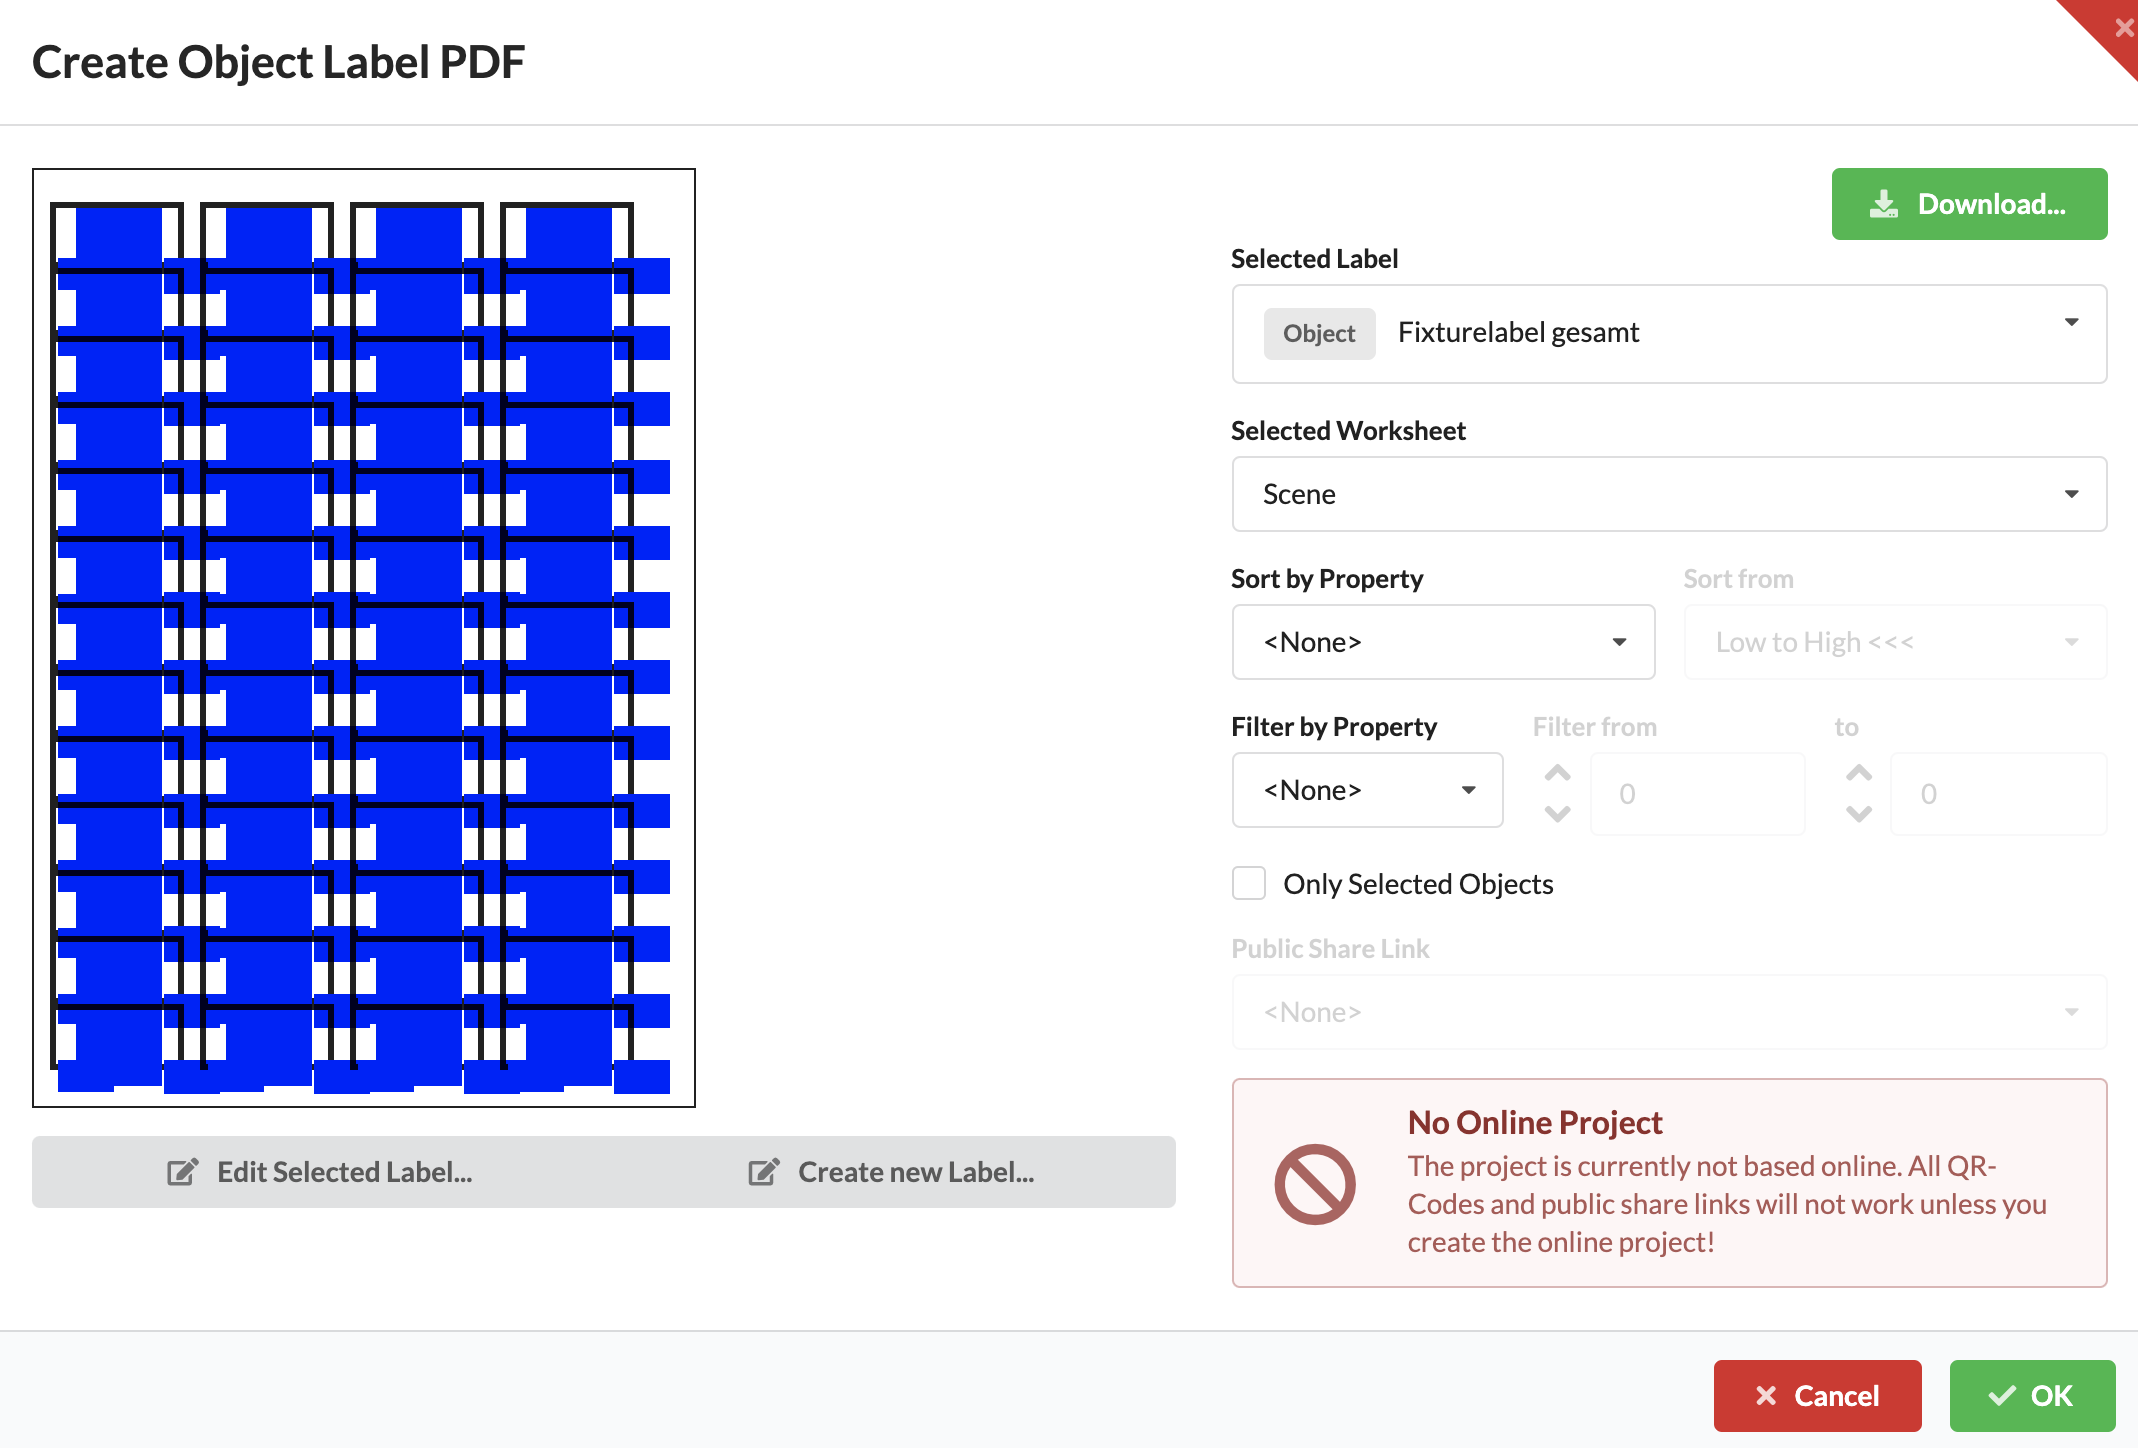
The preview provides only a rough indication here. However, the black borders provide the correct indication of how many labels are printed on a page. The blue boxes represent the individual fields. An accurate PDF opens when you click OK. From there, the PDF can then be printed. It would be useful to make a single test run on your printer.