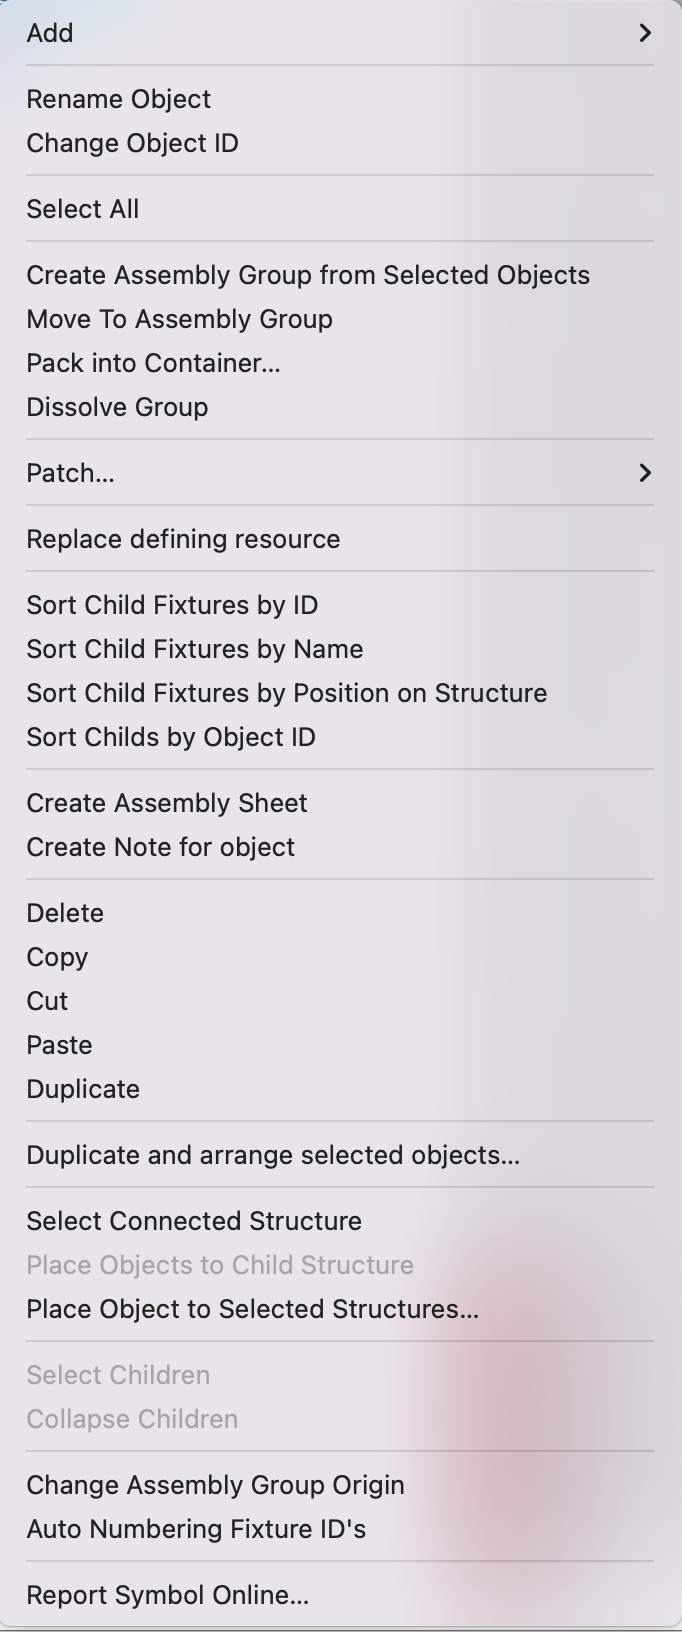
Right-clicking on an object in the Scene Tree opens the context menu with the following commands:
This command selects all objects displayed in the Scene Tree.
All selected objects are added to a new Assembly Group, which must then be named.
The selected objects can be added to an existing Assembly Group. To do this, you select the desired Assembly Group from the drop-down menu.
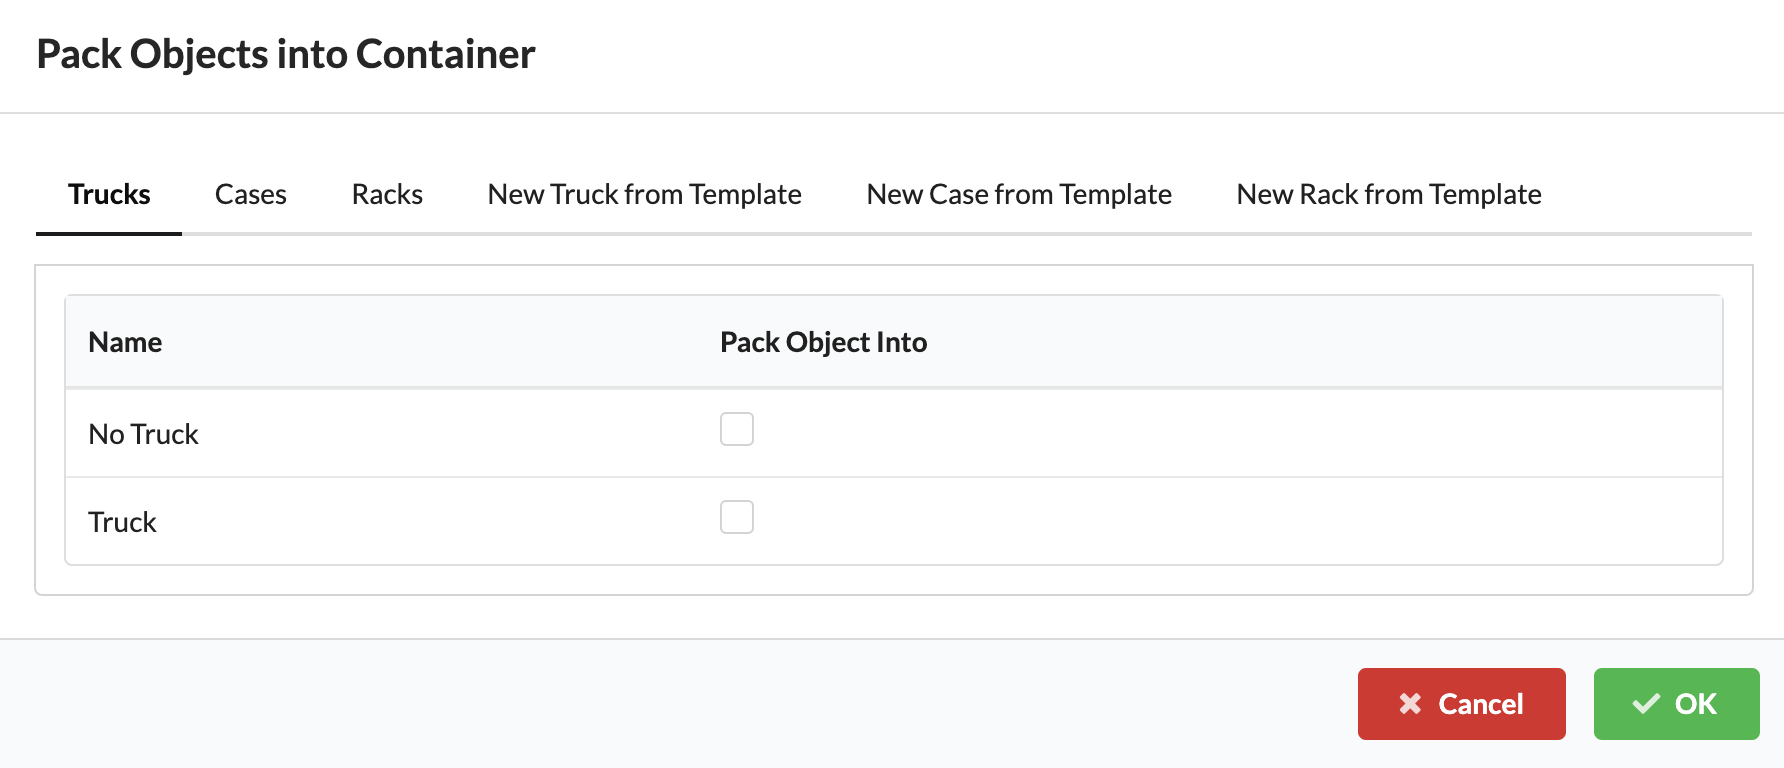
For truck planning or for case/truck and rack overviews, all objects can be packed into a case, truck or rack. You can pack them into an existing case, truck or rack, or create a new one from a previously created template. Cases and racks can also be packed into a truck.
Information on creating templates can be found in the chapter Resource Manager.
If you want to dissolve a previously formed Assembly Group, select the group to dissolve and select the command Dissolve Group.
Fixtures or other objects that draw current (Consumers) can be automatically connected to a power distributor (Distributors) with this command. To do this, both the consumers and the distributors must be included within an Assembly Group. Then the Assembly Group can be selected, and the command executed. The program automatically searches for the next suitable distributor and connects it to the consumers.
This command connects all fixtures within an Assembly Group in sequence as a daisy chain.
Note: By default, the fixtures are patched with the set Mode/DMX Footprint. You can also select the option "biggest mode" in the menu bar under Settings.
Select the desired fixtures or other current-drawing objects (Consumers), as well as the power distributors (Distributors) to which they should be connected. Production Assist then connects the objects to the selected power distributor in sequence.
This command connects all fixtures within an Assembly Group sequentially as a daisy chain.
Note: By default, the fixtures are patched with the preset Mode/DMX Footprint. You can also select the option "biggest mode" in the menu bar under Settings.
All objects in the Scene Tree can be replaced with other objects. To do this, select the desired object(s) and select the Change Defining Resource command. The resource selection opens. Here you can import and or select new resources to replace the previous ones.
Fixtures within an Assembly Group can be sorted by fixture ID, name, or position order. To do this, select the appropriate Assembly Group and use the command Sort Child Fixtures by ID or Sort Child Fixtures by Position on Structure.
By running the Create Assembly Sheet command, you can create a worksheet for any selection of objects in the Scene Tree. These worksheets serve in later paperwork for the purpose of subdivision and structuring when working, as well as for documentation.
Further information about paperwork can be found in the Dokumentation Tutorial or in the chapter "Assembly Sheets".
This attaches a note to the object that all stakeholders can see.
These commands can be used to delete, copy, paste, and duplicate objects in the Scene Tree.
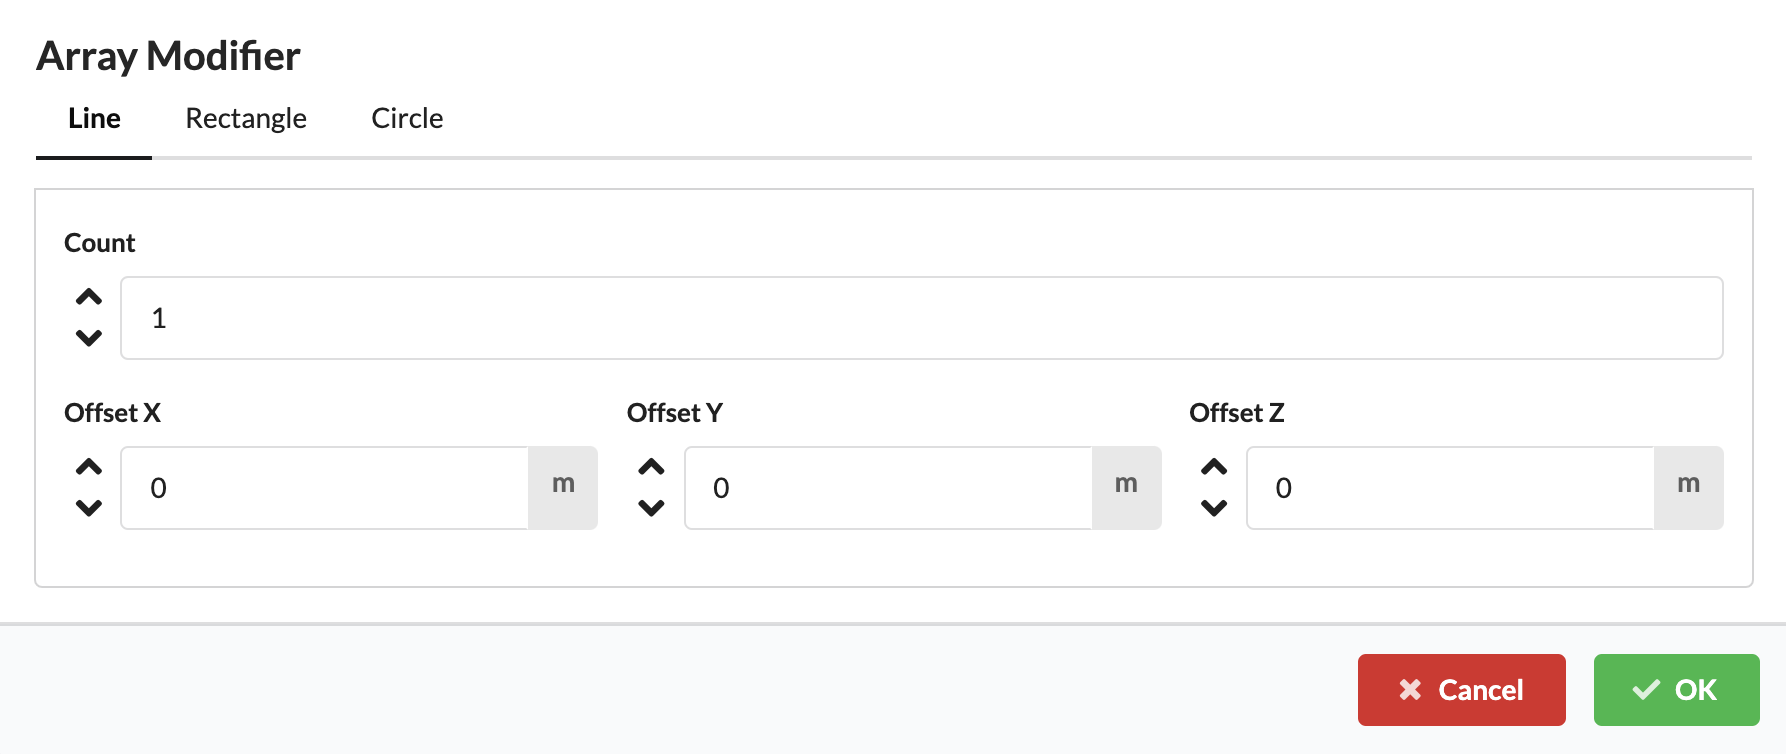
In addition to the Duplicate command, there is another way to duplicate objects. With Duplicate and arrange selected objects, a desired number of fixtures can be defined and the Offset, i.e., the distance of objects to each other in terms of X, Y and Z directions, can be specified. This makes it possible to duplicate objects in a linear form, in a circle or as a grid.
If you select a truss piece and then use the Select Connected Structures command, you will get all the truss parts connected to the activated truss part.
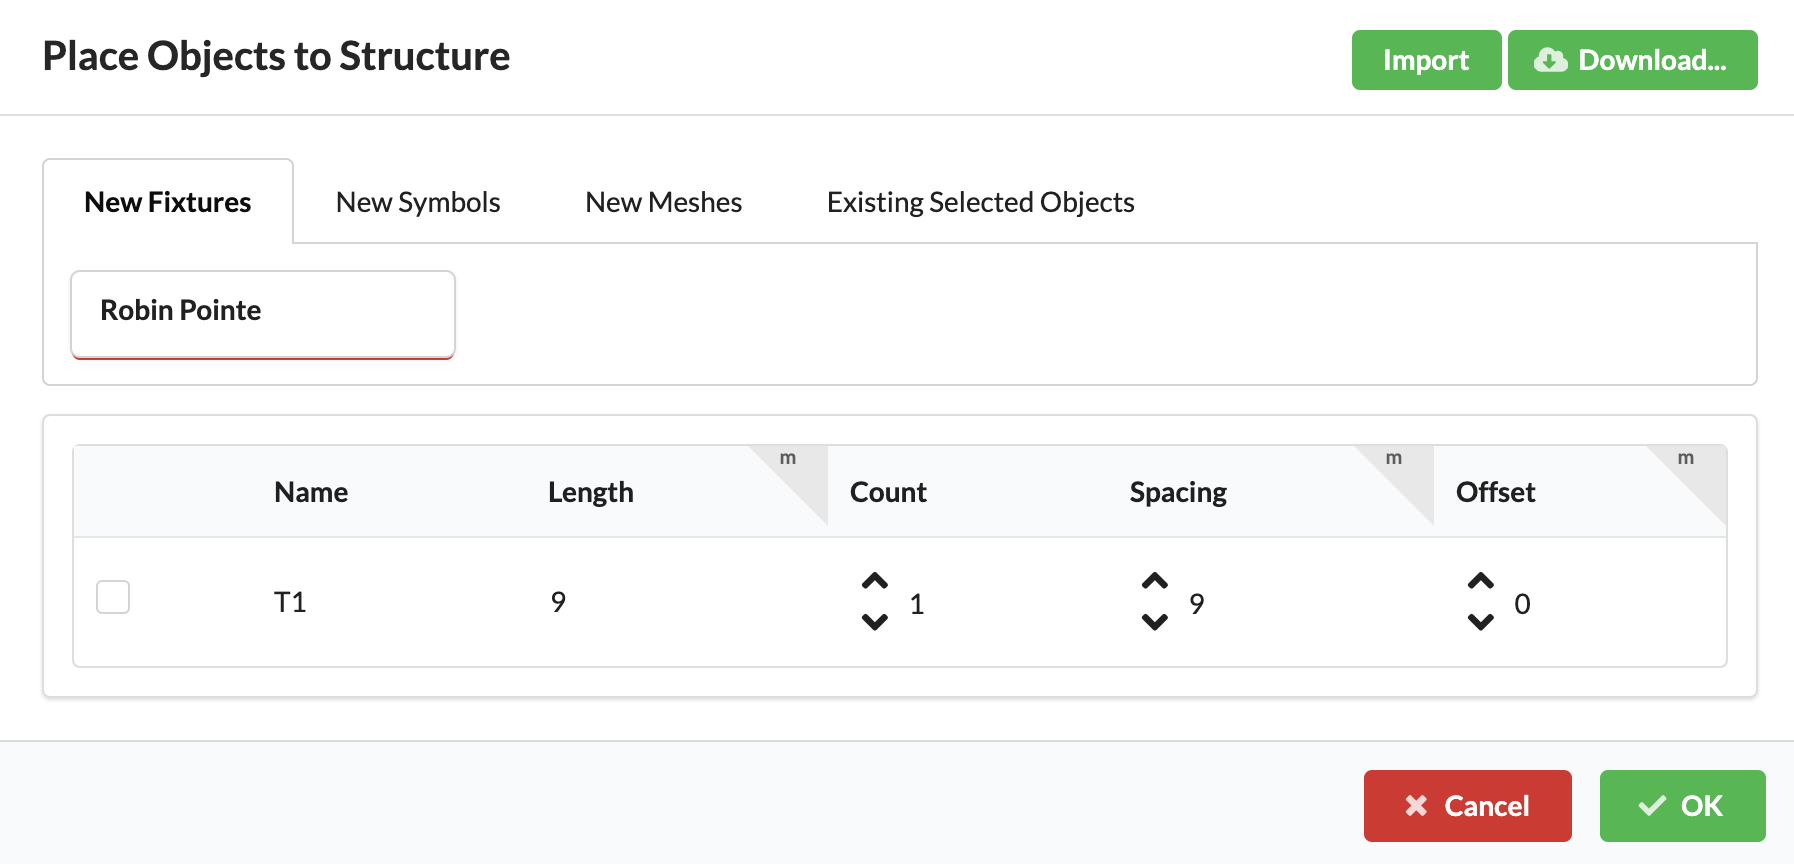
You can place a certain number of fixtures evenly along the length of a structure/truss. Fixtures/GDTFs, symbols or meshes can be placed there.
Select the Assembly Group of the desired structure/truss section and select Place Objects to Child Structure from the context menu. A window opens in which you can then select one or several objects from your drawing that are to be placed. Objects not yet in the drawing can be selected using the green Import or Download buttons.
Then you set a check mark at the structure on which the objects are to be placed, select the number of objects (Count) or the distance of the objects to each other (Spacing) and what distance they should have to the beginning/end of the structure/truss (Offset).
The Select Children command selects all subobjects in an Assembly Group in the Scene Tree. To do this, click on the desired Assembly Group and select the command in the context menu.
This command collapses the selected Assembly Group, making the subobjects in the Assembly Group invisible. This helps in maintaining a clear overview of the Scene Tree.
When you create an Assembly Group, the center of all objects is automatically defined as the origin/zero point of the group to which the group's coordinates refer (marked as a green ball). This command can be used to move this automatic zero point within the group.
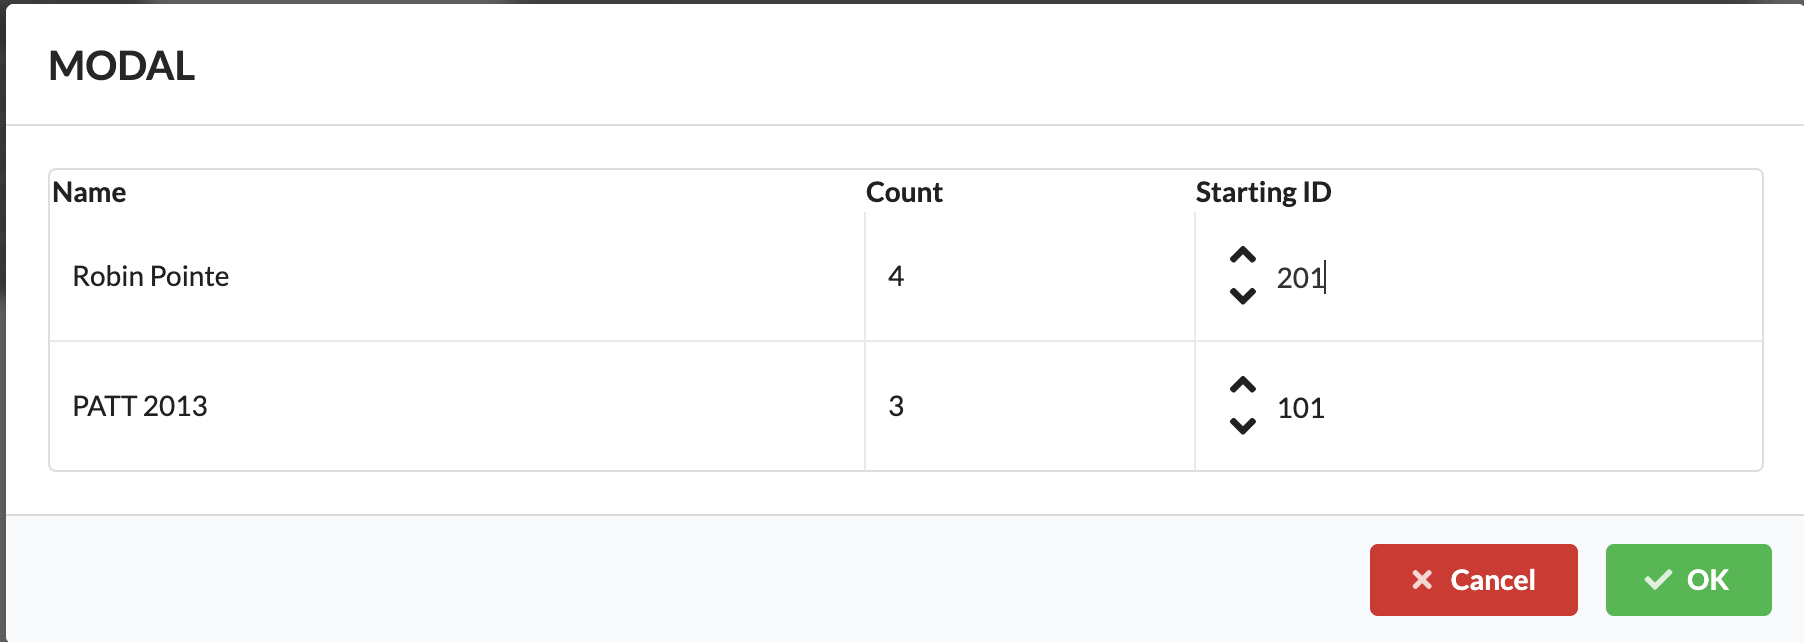
This command assigns a Fixture ID to the fixtures within an Assembly Group. Select the desired Assembly Group, select the command, and enter the startup IDs for the different fixture types in the window that opens.