

Labels are individually printed with various information about objects and used on site. You can also get a QR code to access the latest information online.
Label templates are created in the Resource Manager in the Print Labels tab. There you have several options for creating a new label:
Under Preview you will see a rough preview of the label.
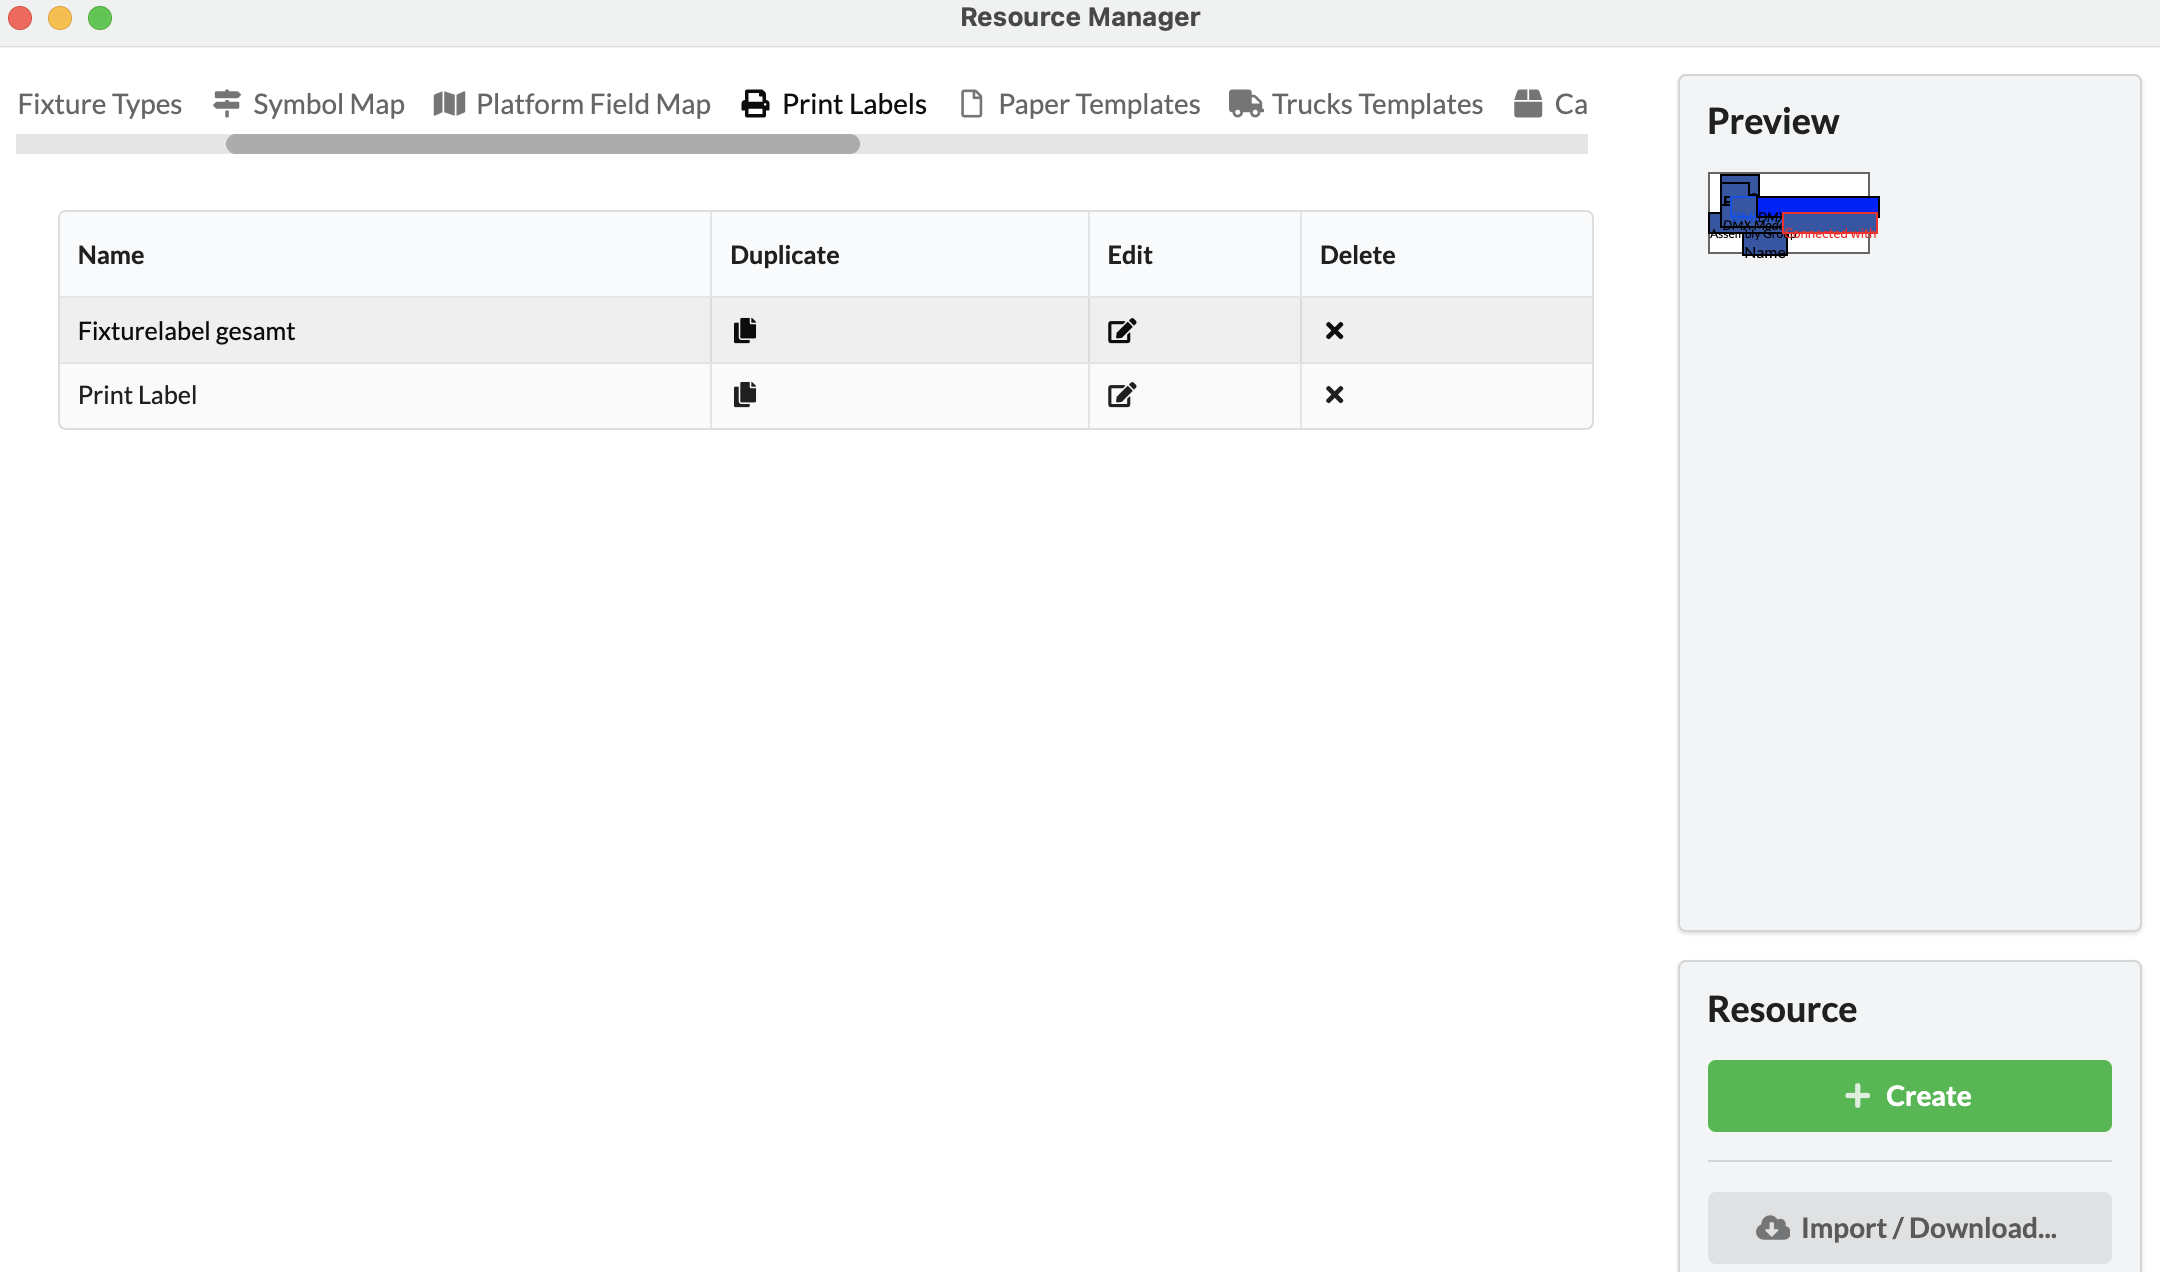
To edit the template that has just been created, simply click on the pencil icon (Edit) in the corresponding table row. It switches to the Renderer and there to Edit mode. The Edit Geometry window opens with a wide yellow bar at the top. There you will also find the options to exit the mode by saving or discarding the changes.
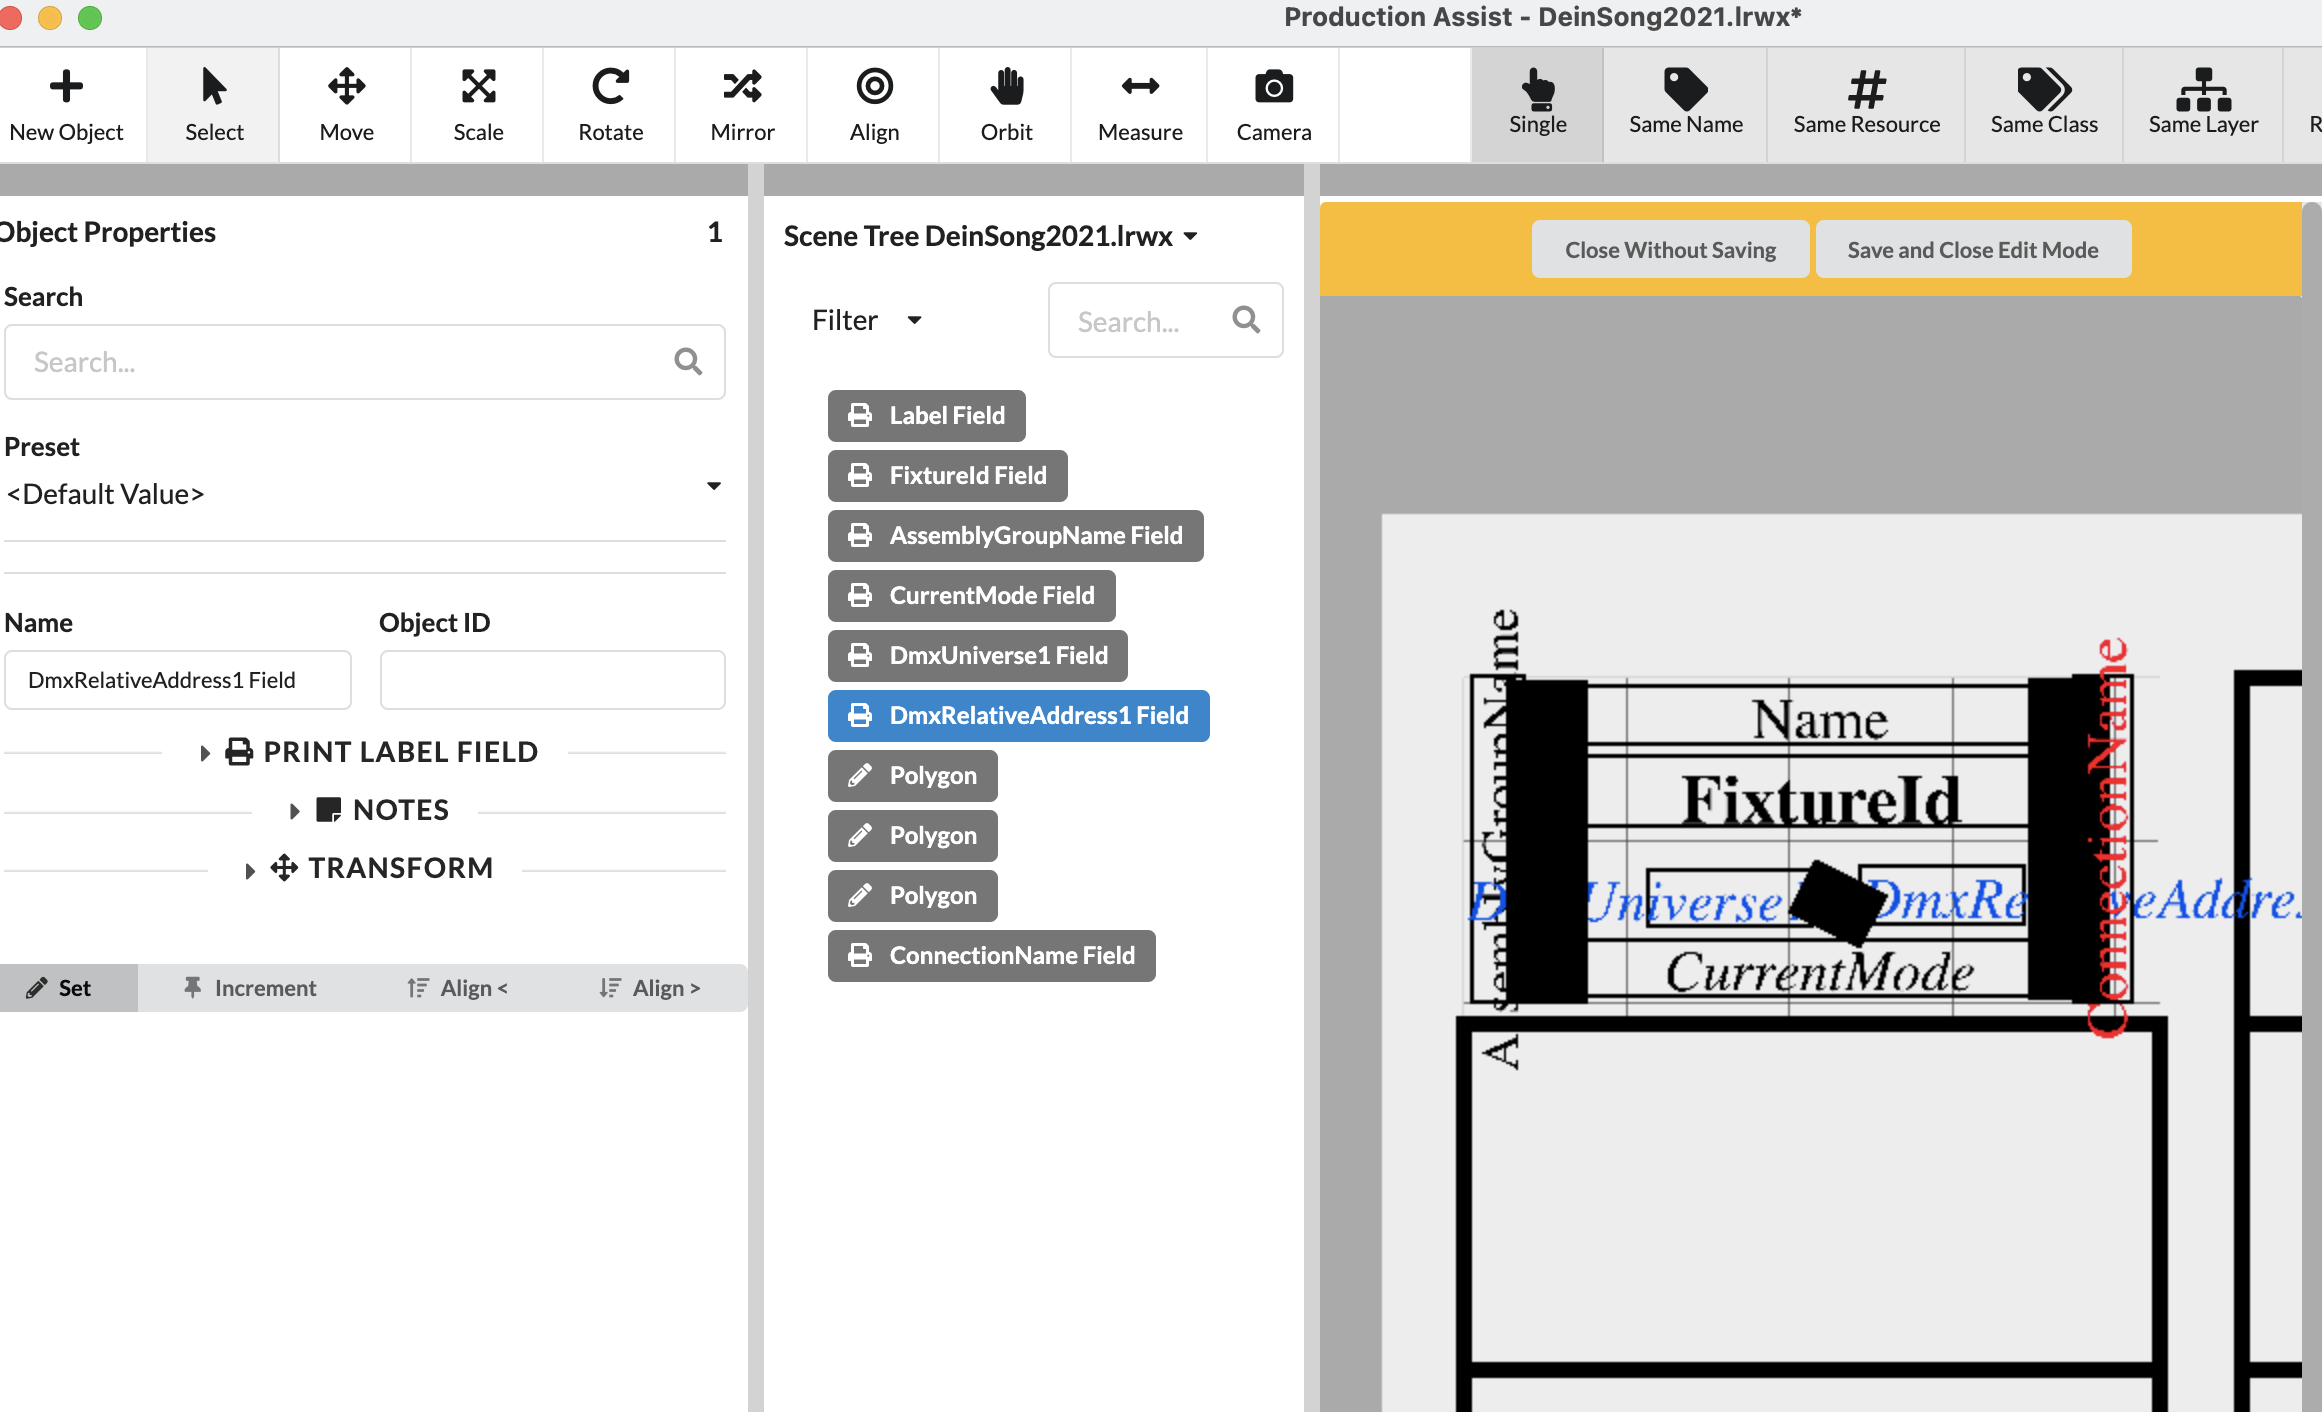
You will now see the elements that the symbol contains in the Scene Tree. You can click on these and delete them, rename them or edit their object properties. You can also add new items using the New Object tool on the toolbar.
If no objects/fields in the Scene Tree are present or activated, you can supply the name of the label template under Name in the Object Properties and define the following points under Print Label:
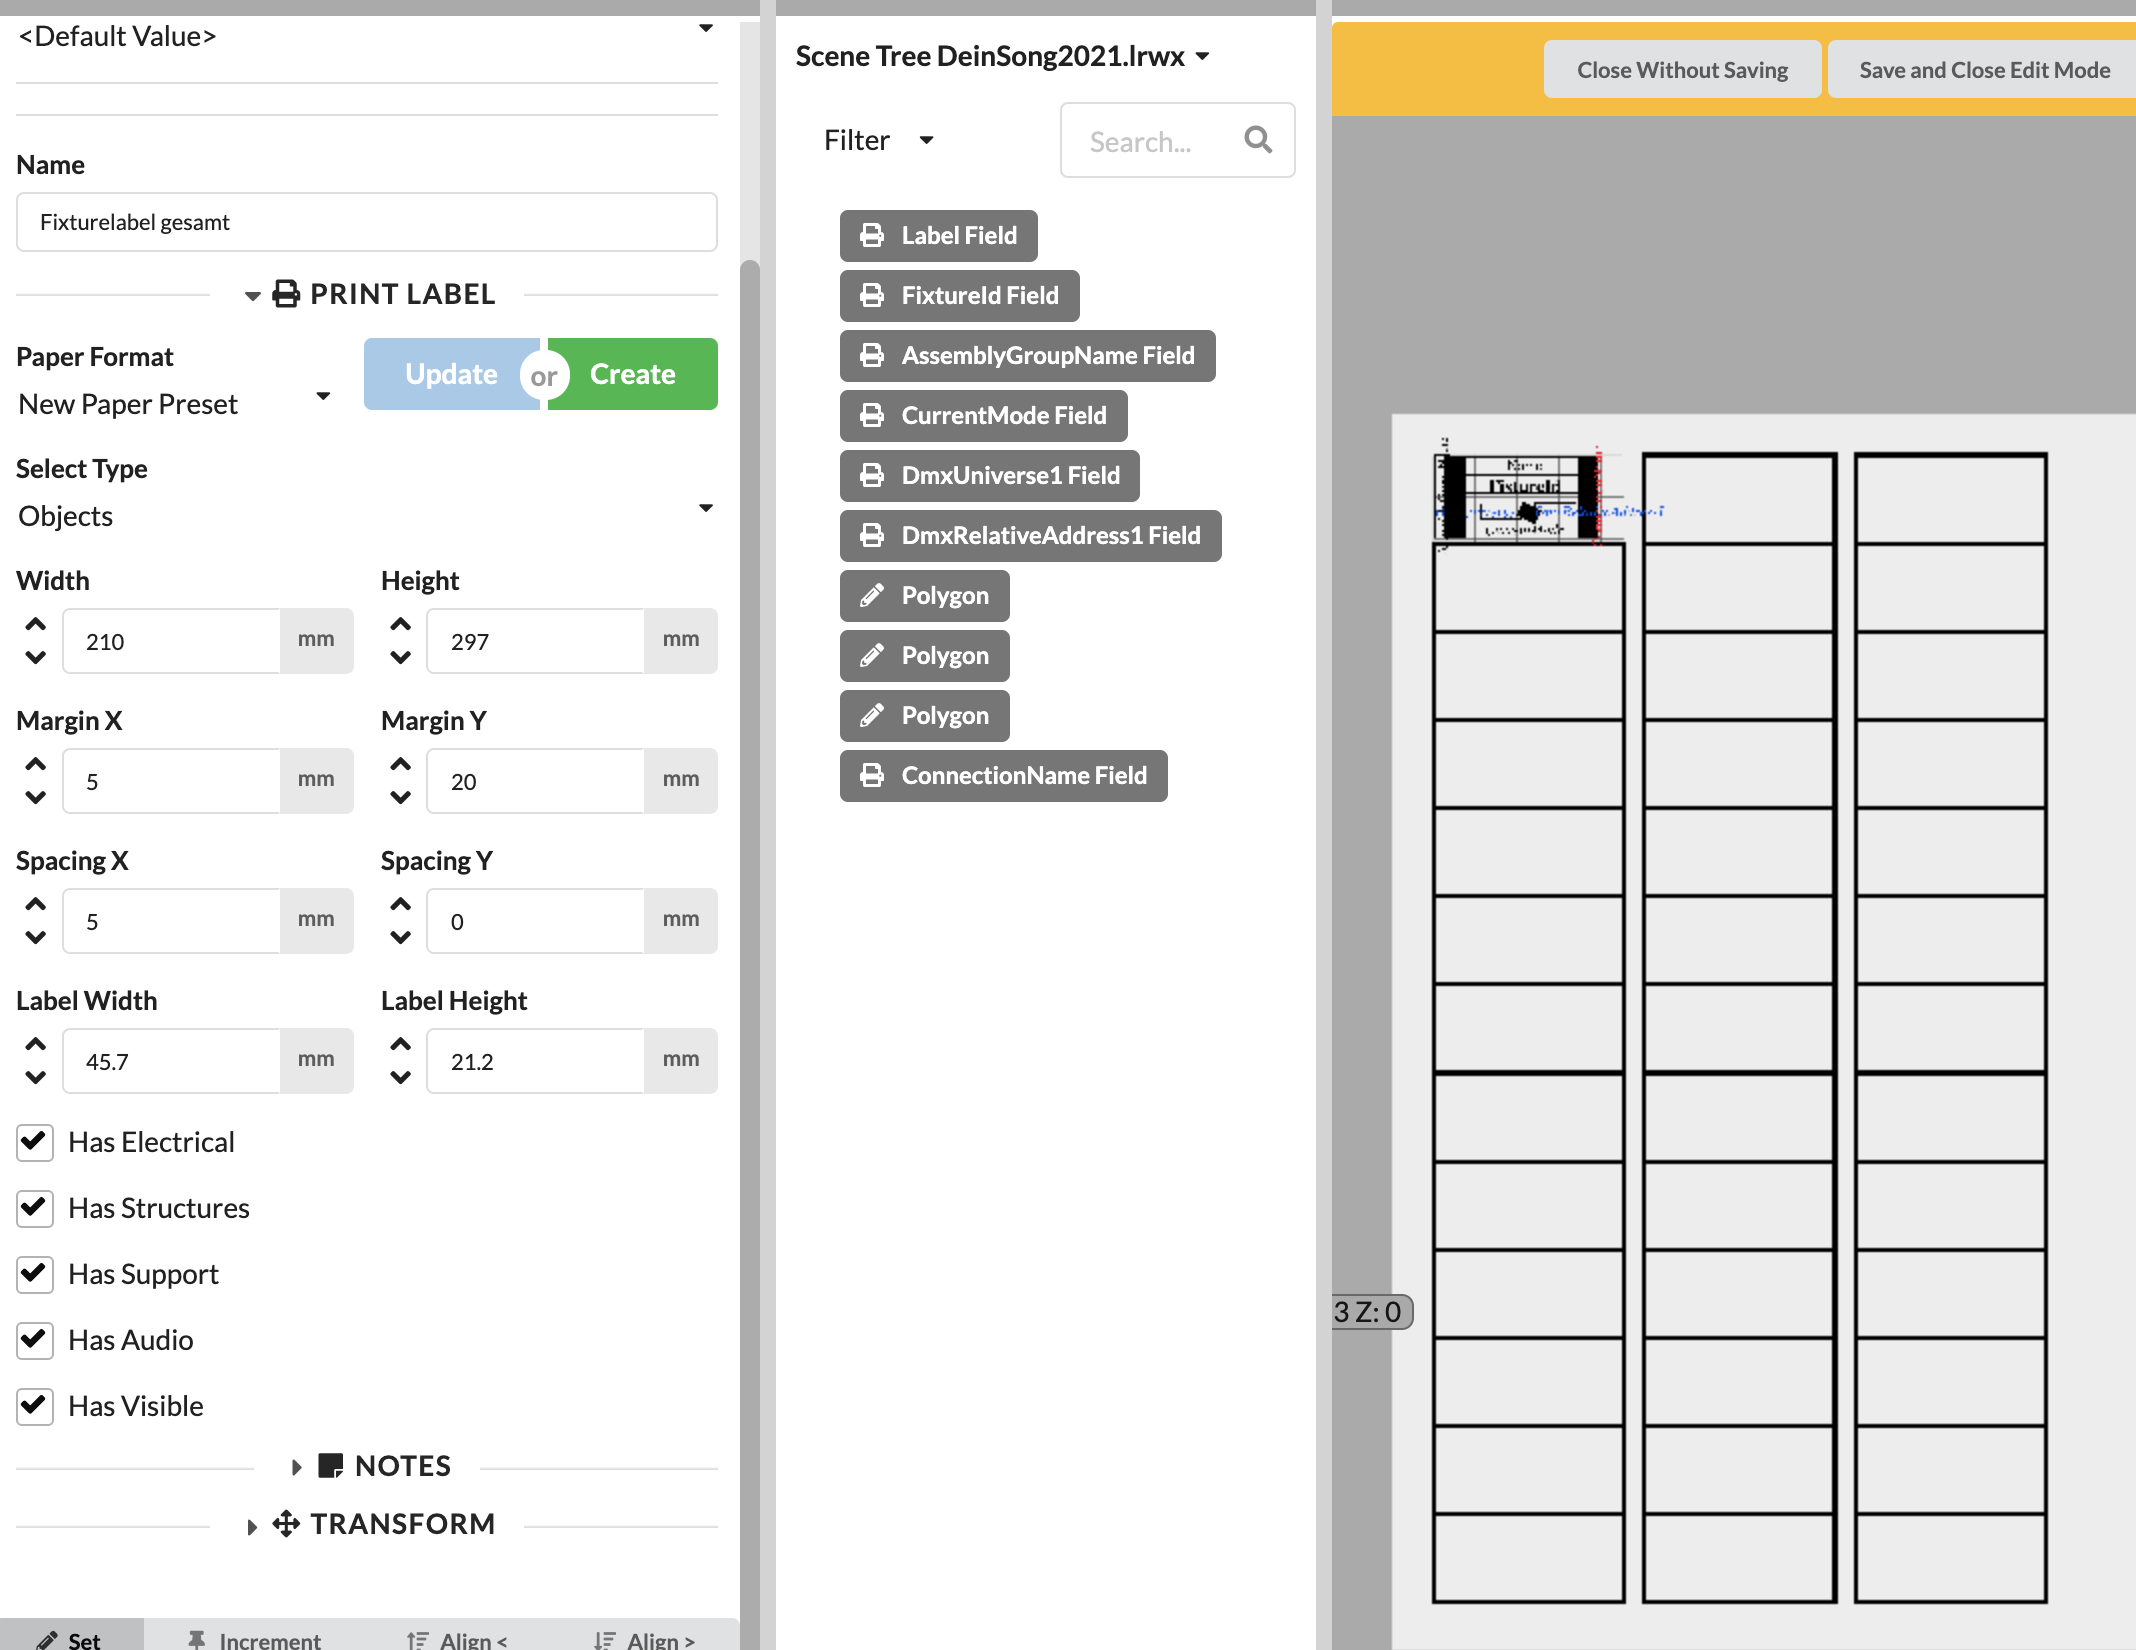
Once the settings have been made, they can be saved as a template by clicking on the green Create button and entering a name. You can retrieve them or update them again later (Update).
In the Resource Manager under Paper Templates, you can see your templates and their values, and you can edit the values by clicking in a column.

There you can also create a new template via Add Paper.
In the label’s Edit Mode, all templates appear in the Paper Format drop-down menu, and by entering the name of the template you can also search for it directly. There you will also find empty standard DIN paper sizes.
In the Renderer, you will always see a preview of your sheet with the arrangement of the labels based on the data you have entered.
coming soon...
In the Renderer, you will always see a preview of your entire sheet with the labels it contains. The active label template on which we position the fields we want is always the first label at the top left that displays the 10x10mm grid.
New Object on the toolbar can be used to add label fields (Print Label Field), 2D lines/shapes (Polygon) or Assembly Groups. The latter, however, only serve toward structuring the Scene Tree and have no influence on the appearance of the label. The label fields display the selected values/properties of the objects later in the printout. In addition, a QR code can be added, which then refers to the current information of the object available on the online project website.
Once you have added a label field to your template, you can position it by drag and drop it. Of course, you can also set the exact position and rotate the field in the Object Properties under Transform.
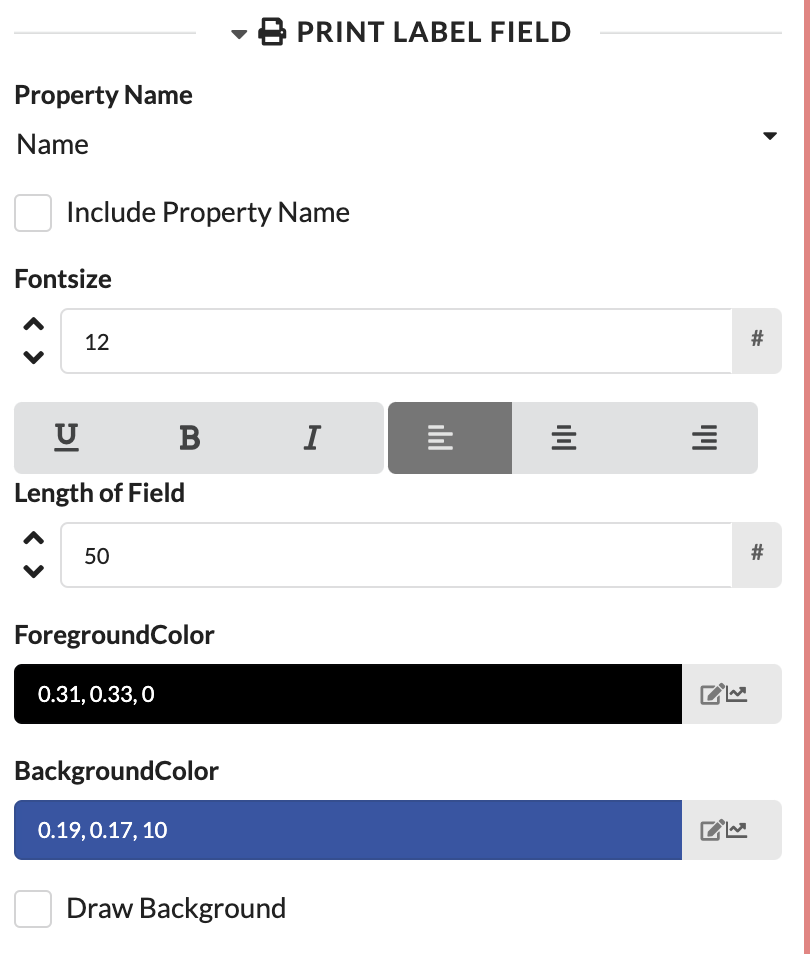
In addition, in the Object Properties under Print Label Field, you define which property the field should display under Property Name. If you check the box next to Include Property Name, the property name is always displayed before the property value (e.g., "Name: Robe Pointe"). Then you can format the font and specify how long the text field should be. If the value/text is longer than the field, it is truncated. This prevents text from overlapping on the label at the end. Now you can define the font color and background color and decide whether the background should be colored at all (Draw Background).
Furthermore, lines or polygons can be inserted as elements. To do this, select the Polygon option via New Object and then then under Mode select Line (simple line) or Array (polygon line).
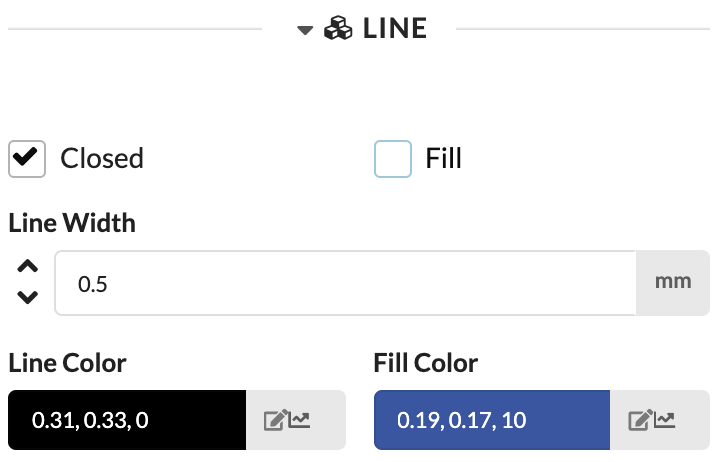
Again, you can make a few formatting settings in the Object Properties under Line:
When everything is ready, click Save and Close Edit Mode in the yellow bar at the top of the Renderer.
On the menu bar, under File Export, select Print Labels.
On the right side of the window that now appears, you can select your label template (Selected Label) or download a finished online template or import from your hard drive.
If you only want to print objects from a specific assembly sheet, you can select it under Selected Assembly Sheet. Otherwise, all objects will be printed that match the filter criteria that you have defined when you created the label (Scene).
You also have the option of selecting an order in which the labels are arranged on the sheet. To do this, select a field to sort by (Sort by Property) and then whether the highest or lowest value comes first (Sort from).
You can also filter so that only labels for certain objects should be printed, for example, only labels for fixtures, with a FixtureID from 101 to 150. To do this, search Filter by Property to find the property you want to filter for and then enter the values under Filter from... to.
Enabling Only Selected Objects prints only labels for the objects activated in the drawing.
And if the project is stored online - i.e., on the Production Assist Server - you can also generate a link to the PDF label. If it is an offline project, QR codes will naturally not serve any purpose.
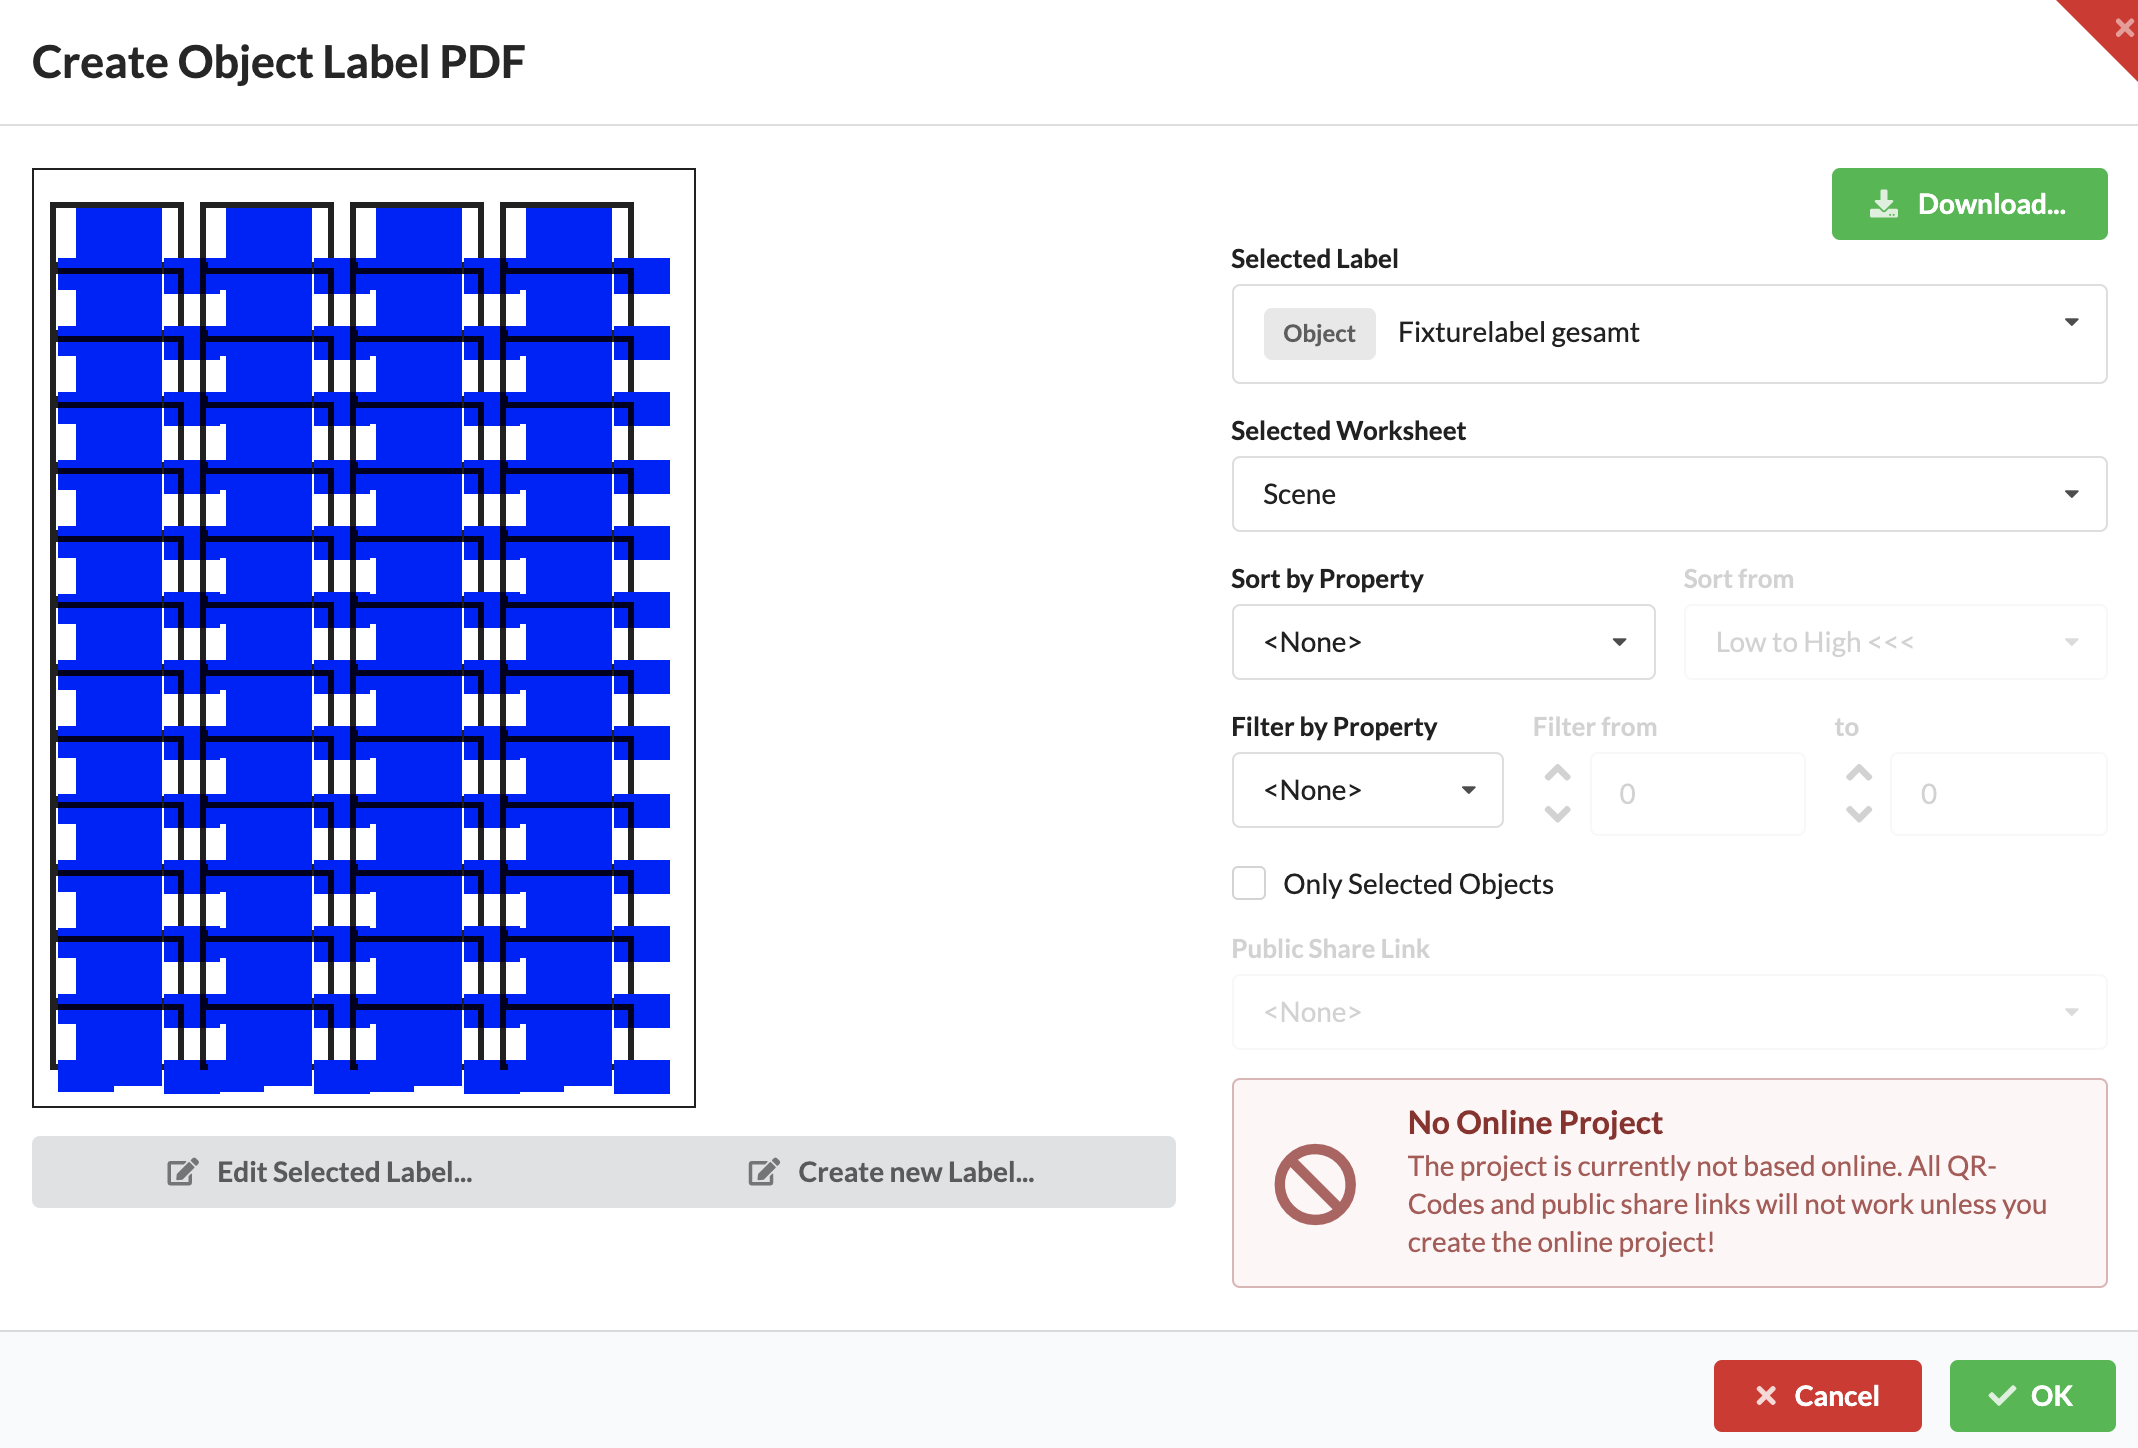
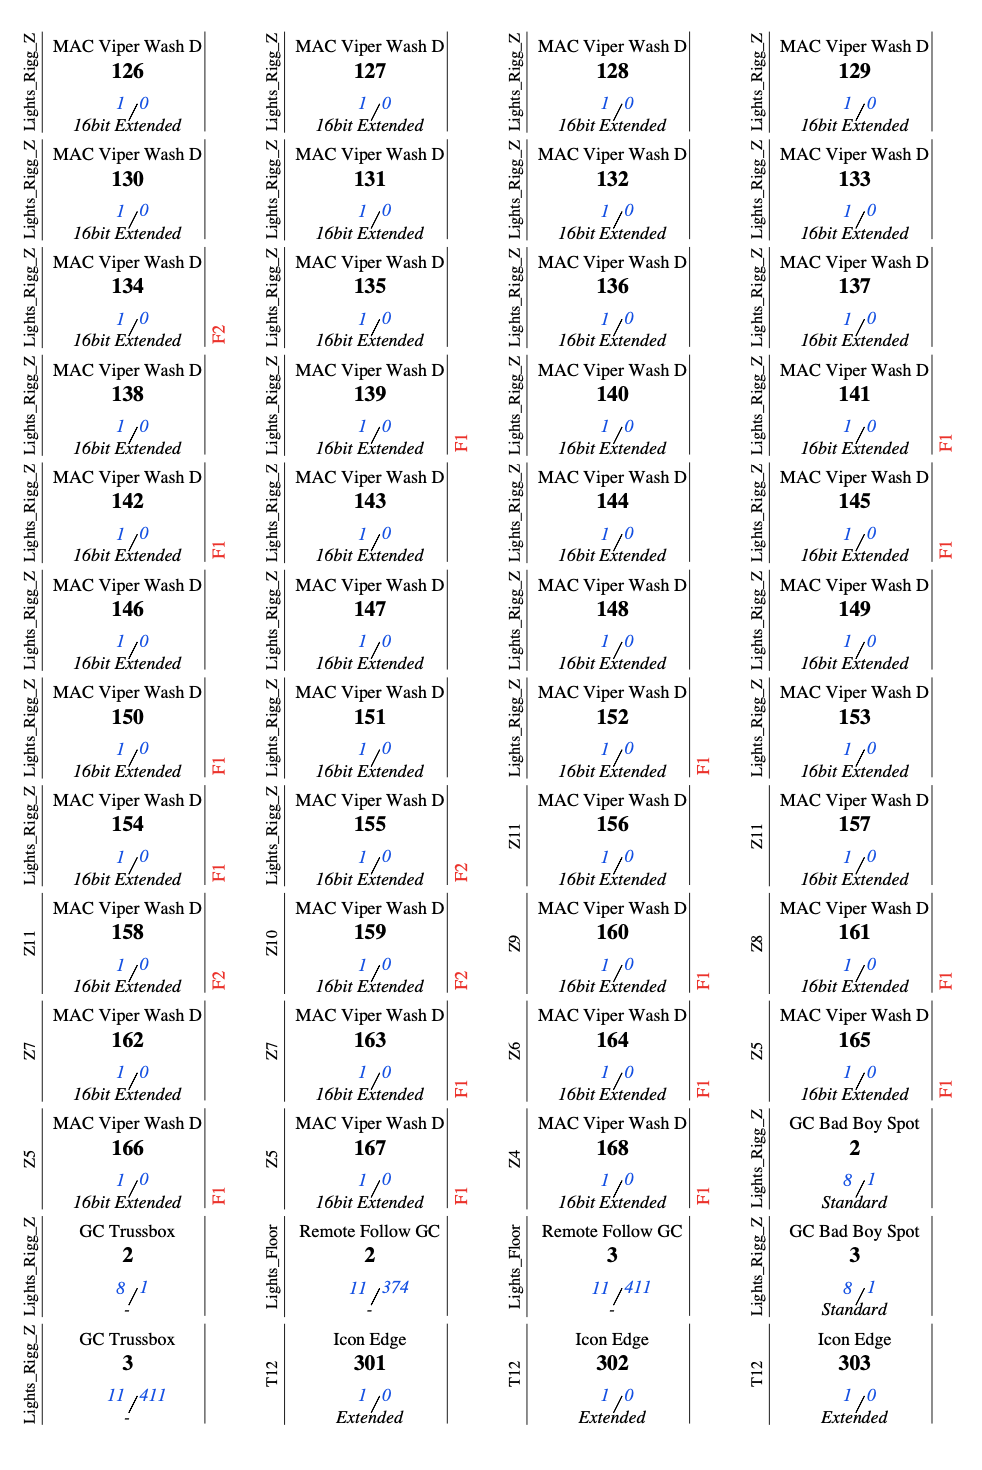
On the left side of the window you will see a rough preview of your sheet layout. The black borders indicate how many labels will be printed on a page. The blue boxes represent the individual fields. A PDF file opens and accurately depicts labels and fields when you click OK. You can the print PDF file.
If you want to edit your label template again or create a new label template, then you can go directly back to Edit Mode by clicking Edit Selected Label or Create New Label.